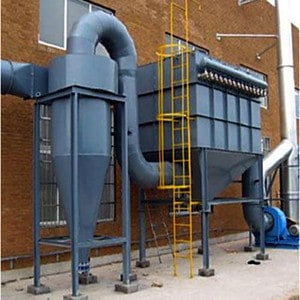
Where to Spend and Where to Save on Dust Collector Components
Regardless of your industry, business size, or region, keeping the air clean and your workers safe is a top priority. This is where dust collection systems come into play. They not only protect your employees from harmful carcinogens and health issues, but they keep your equipment running smoothly and your business compliant and out of the crosshairs of regulatory agencies. With those priorities in mind, it’s important to note that selecting the right parts for your dust collector is more than just looking at the price tag. Let’s dive into the art of making smart decisions – knowing where to invest and where to save when it comes to dust collector components.
Don’t Skimp on Filtration Efficiency
Before we get into the nitty-gritty of costs, remember that filter performance is the most crucial element of your dust collection system. Filters are like the guards at the gate of safety, health, and compliance, and their job should never be compromised. When it comes to dust collector filters, it’s about finding the right one for your application. It’s like cooking a good meal – you need the right ingredients. Once you find the right one, you have to make sure to replace them before they fail and damage your system. Read more: How often should filters be changed?
It is very common for users to look for deals on filters – for example, replacing a high-efficiency nano cartridge filter with a cheaper 80/20 cartridge filter to save on cost. However, in this case the 80/20 cartridge offers roughly half of the filter area of a nano filter of the same size, meaning your system can now handle half of the air flow it was designed for! And the efficiency of the cheaper filter is much less – MERV 11 vs. MERV 15, so there is a good chance that you will be emitting much more dust than expected. Finally, the 80/20 filters will wear out significantly faster than the better filters. So it worth paying more for a better filter with longer life, better efficiency and better performance throughout your system? You bet! The total cost will be lower in the long run (see farther down).
Being Eco-Friendly Matters
Your duty is not only to your workers but also to the environment. In a world of strict rules, your choices should match the limits set for different types of dust. Some dust is just annoying, while others can be harmful. Sometimes, the law requires you to use extra-efficient filters, especially for hazardous dust. Knowing these rules helps you pick the right filter. Learn more about these regulations.
More Than Money: Considering Dust Particles
Look beyond the cost and consider the characteristics of your dust. Is it fine or coarse? Is it combustible? Is it sticky? These things really matter when choosing the right filter. Some may think that obtaining the right filter is very expensive and may look for cheaper alternatives. Check here why this is a dangerous decision: Why Are My Baghouse Filters So Expensive?
The Real Costs: Total Cost of Ownership (TCO)
As any good supply chain professional knows, the up-front price tag doesn’t tell the whole story. There’s more to cost than just buying the item. TCO is a fancy way to say, “How much does this really cost over time?” It includes energy use, how often you change filters and cages, and other hidden expenses. E.g.: Using electricity costs money. Filters need air to flow through them, and that takes energy. But there are smart ways to save energy, like using special fans that don’t waste electricity.
Money-Saving Options
One item that perfectly illustrates the difference between short-term cost and long-term savings is the use of VFD (variable frequency drive) fan controllers. A VFD allows the user to run their dust collector fan at a lower or higher rate to manage performance. Rather than simply flipping a switch and running your fan at full speed (think 40kW per hour), the fan motor will run at a lower rate, saving significant energy costs in the long
run. Generally, upgrading your fan controller to include a VFD will cost several thousand dollars, but this cost is easily recouped after a year of running your system more efficiently.
Next Steps: Being a Smart Chooser
Remember, this is more than just a dust collector. It’s about keeping your workers safe, your equipment in shape, and your business running well. So, when you’re thinking about where to spend and where to save, remember that the journey to a better dust collection system goes way beyond just buying stuff. It’s about being smart, safe, and forward-thinking.
Take a deeper dive into our dust collection blog for more helpful articles and insights. Let’s make your dust collection system the best it can be!
Contact Us to Speak to One of Our Baghouse Experts.
For more baghouse related training and information, be sure to check out our Baghouse Online Training page.
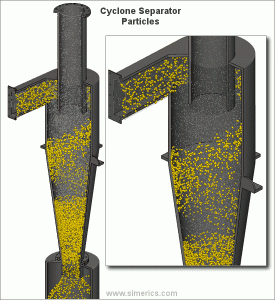
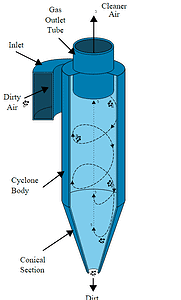 Here’s how a cyclone dust collector works: