How to Measure Your Baghouse Filters & Cages

When ordering replacement baghouse bag filters, it is extremely important that you order the right size to ensure a proper fit in your baghouse.

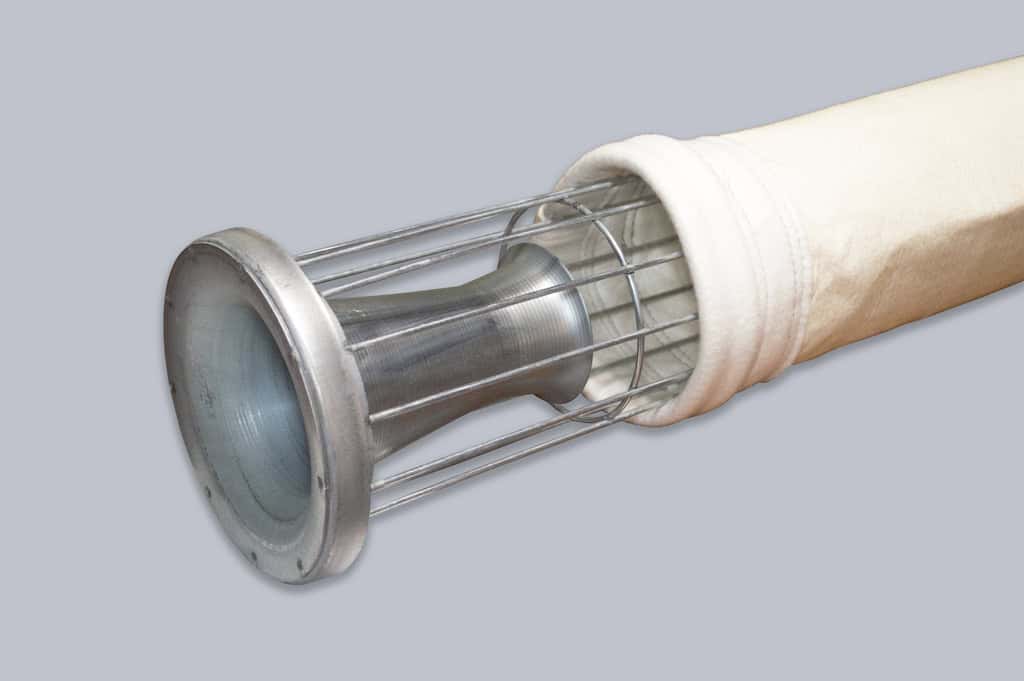
Properly fitting bags and cages are integral to achieving long filter bag life and optimum baghouse performance. Filter bags come in a huge variety of sizes and types, to fit many makes and models of baghouses.

Measuring Filter Bags & Cages - Key Terms

Flat Width/Diameter

This is the most critical measurement, and the one people most often get wrong. As we need this size correct down to a ⅛”, it is not possible to measure the diameter of a loose bag accurately enough for ordering. For that reason, we instead rely on a flat width measurement, which we can then convert to an accurate diameter. 

Overall Length 

For top load pulse jet bags, the bag is the same length as the cage or just 1⁄2” longer. For bottom load pulse jets, where the top of the raw edge bag is folded over the top of the cage, we recommend 4” of overlap, but some OEMs recommend 2”. 

Tubesheet Hole Size/Snap Band Size 

Often the hardest dimension to confirm, a hole size measurement accurate down to 1/32” is required to ensure proper fit. For best results, measure the hole with calipers or check the OEM drawings for details. Alternatively, you can send a sample bag to confirm the tubesheet hole size or have us make a sample bag/cuff to test fit before releasing the entire order to production. 

Size Draft/Accurate Specifications

While it is usually possible to rely on previous bag sizing when reordering, at times, there may be reason to reconfirm all bag and cage sizing choices. Over time, sloppy or copy errors can result in slight variances in sizing making their way into orders and company records. In this way, the original bag sizing can see a slight, but impactful creep over successive orders. 

When we suspect this has happened, we may ask you to go back and provide us with the fundamental component sizing that dictates the overall bag and cage sizing. For top load pulse jet, reverse air, and many shaker units this is the tubesheet hole size. For bottom load pulse jets, and some reverse air/shaker units, it is the mounting hub/venturi. 

Once we have this fundamental sizing information, we can then recommend the proper bag and cage sizing. 

Bag/Cage Fit or “Pinch”

Filters that are too loose or too tight on the cages will severely limit collection efficiency and lead to premature failure. For most felt bag materials (polyester and aramid/nomex being the most common) we generally recommend ¼” to ½” of pinch, meaning the bag diameter is that much larger than the cage. Other specialty fabrics such fiberglass, P84, and fabrics with PTFE membrane applied to them may require tighter tolerances. 

Number Cage Vertical Wires and Horizontal Ring Spacing

Proper care must be taken to ensure that the cage construction will properly support the filter bag as well as optimize cleaning and efficiencies. Most fabrics work well with using cages with 10, 12 or 14 vertical wires. However, some specialty fabrics such fiberglass, P84, and fabrics with PTFE membrane applied to them require the additional support of 20 wire cages and possibly tighter spacing on the horizontal rings.

Common Bag and Cage Size Combos

Below we have listed a few common sizes for pulse jet and reverse pulse systems in use today. 

Top Load Style

  • —Bag: 6.25” x ¼” tubesheet hole, 5.875” diameter x 96”/120”/144” long, snap band top, disk bottom – Cage: 5.625” diameter x 96”/120/144” long, turned down flange top (with or without integral venturi), pan bottom, 12 vertical wires, horizontal rings on 8” centers
  • —Bag: 6.25” x ¼” tubesheet hole, 6” diameter x 96”/120”/144” long, snap band top, disk bottom – Cage: 5.75” diameter x 96”/120/144” long, turned down flange top (with or without integral venturi), pan bottom, 12 vertical wires, horizontal rings on 8” centers
  • —Bag: 5” x ¼” tubesheet hole, 4.625” diameter x 96”/120”/144” long, snap band top, disk bottom – Cage: 4.5” diameter x 96”/120/144” long, turned down flange top (with or without integral venturi), pan bottom, 12 vertical wires, horizontal rings on 8” centers

Bottom Load Style

  • —Bag: 5.865” diameter x 100”/124” long, raw top, disc bottom – Cage: 5.625” diameter x 96/120”” long, split collar top, pan bottom, 12 vertical wires, horizontal wires on 8” centers (Flex Kleen style bottom load)
  • —Bag: 4.625” diameter x 100”/124” long, raw top, disc bottom –  Cage: 4.5” diameter x 96/120”” long, split collar top, pan bottom, 10 vertical wires, horizontal wires on 8” centers (Mikropul bottom load and “twistlok” style)
Baghouse Cages - Different Styles Guide

Measuring Filter Bags - Step-By-Step


Top Load, Snap Band Filter Bag 

Flat width/Diameter

  1.  Lay the bag out on a table or floor, flatten it completely.
  2. Use a tape measure or ruler and measure the width across the bag.
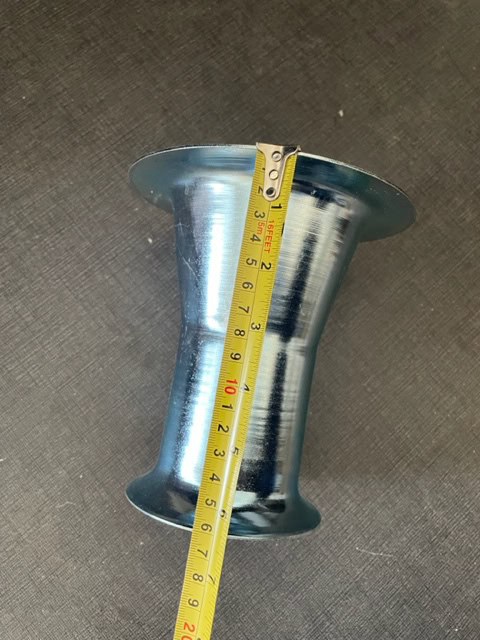
Measuring filter bag


Length

Measure along the seam running the length of the bag. Start at the center of the snap band and end at the first stitch at the bottom of the bag.

Cage-to-Bag (Bag-to-Cage) fit

Should have ¼” to 3/8” pinch; the bottom of the bag should have about a thumbs width between the bottom of the cage and the disc bottom of the bag.


Top Load, Snap Band Filter Bag – Woven Fiberglass

  1. Flat width: Flatten bag and measure width across.
  2. Length: Measure along the seam running the length of the bag. Start at the center of the snap band and end at the first stitch at the bottom of the bag.
  3. Cage-to-Bag (Bag-to-Cage) fit:  Should have 1/8” or less pinch, but shouldn’t be stretched tight around the cage.

Top Load, Snap Band Filter Bag – Felt with membrane

  1. Flat width: Flatten bag and measure width across.
  2. Length: Measure along the seam running the length of the bag. Start at the center of the snap band and end at the first stitch at the bottom of the bag.
  3. Cage-to-Bag (Bag-to-Cage) fit:  Should have 1/8” or less pinch, but shouldn’t be stretched tight around cage.

Shaker style Filter Bag

  1. Flat width: Flatten bag and measure width across.
  2. Length: Measure along the seam running the length of the bag. Start at the end of the snap band to the end of the bag, not including the tail.
  3. Length of the tail: Measure along the seam from the end of the bag to the end of the tail
  4. Flat width of the tail: Flatten tail and measure width.
  5. Determine if the tail is 3 ply or 4 ply by pinching the material and feeling for layers.
  6. If there is a wear cuff at the snap band end of the bag, measure length and width.

Measuring Cages - Step-By-Step

  1. Full length of the cage:  Measure from top to bottom.


2. Diameter: 
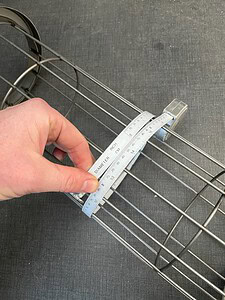
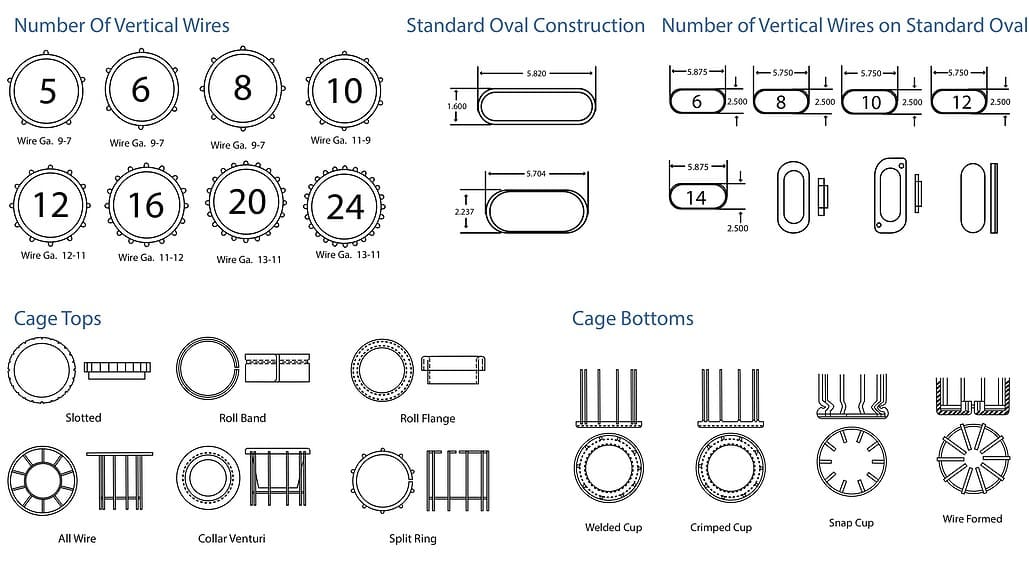
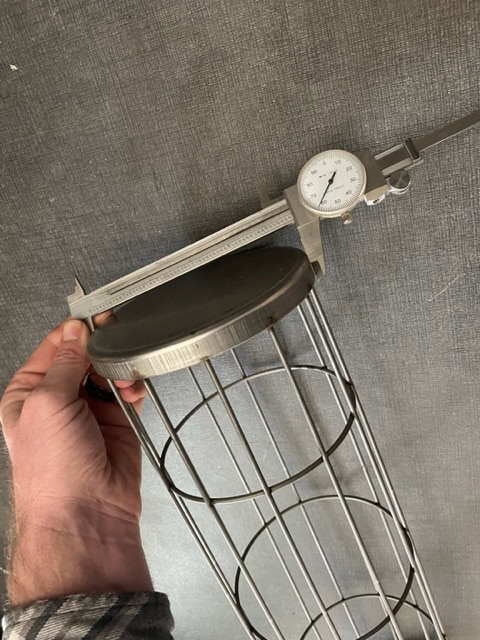
Measure diameter in the middle of the cage at the widest point between wires. Ideally, using a Pi Tape to determine circumference will yield a preferred measurement.
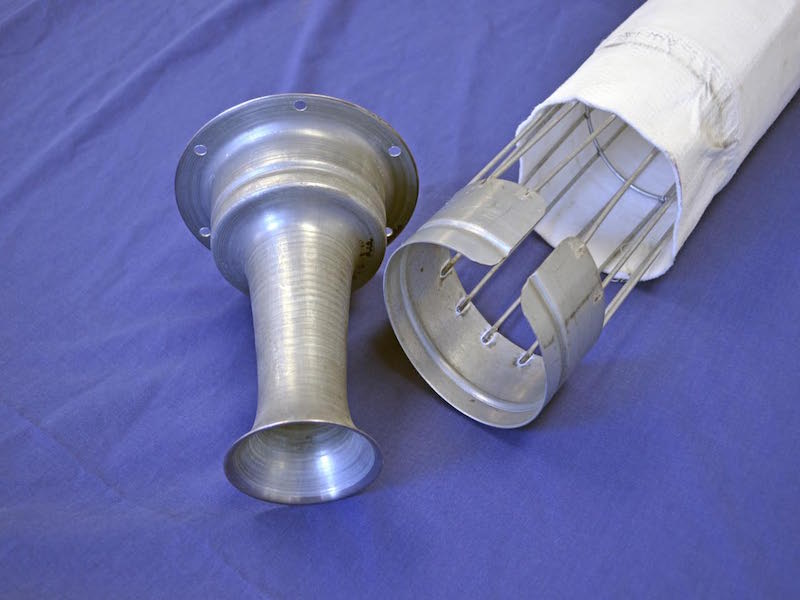
Filter cage measuring

Be aware that some OEMs make the bottom pan slightly smaller than the cage body to make it easier to insert the cage into the bag. This is why you should always measure the diameter near the middle of the cage.

Filter cage measuring
AVOID measuring the diameter of the cage at the bottom. Measure diameter in the middle of the cage at the widest point between wires.


3. Bottom construction: Determine if the bottom cup is crimped or if the wires are welded to the cup. 

4. Number of rings: Count the number of rings.

5. Space between rings:  Measure the space between the rings. Note: the space between the last ring and the bottom of the cup may be different.

6. Number of vertical wires: Count the number of vertical wires running the length of the cage.

7. Material: Plain steel, galvanized, coated, 304 stainless steel, or specify if it is some other material.

8. Determine the top construction of the cage:

    • — If the top has a venturi, measure the length of the venturi.
Filter cage venturi measuring
Venturi come in two styles: A separate drop in piece (shown here) or as integral versions that are welded into top of the cage (see photo below)
The Most Common Dust Collector Cage Styles
Venturi welded into top of the cage
The Most Common Dust Collector Cage Styles
Some of the most common dust collector cage styles are Split Collar (or Rolled Band) for bottom load units
The Most Common Dust Collector Cage Styles
Other most common dust collector cage styles are Rolled Flange (or Turned Down Flange) and venturi for top load units
    • — If the top has a split top, measure the space between the groove in the split top and the end of the top
If the top has a split top, measure the space between the groove in the split top and the end of the top
On split top cages, measure the space between the groove in the split top and the end of the top

Another important measurement to have in mind when ordering filters or cages, is the size of the tube sheet hole where our filters will be placed. This will ensure there is a perfect seal, extending the life of the filters and not allowing dust to go through.

Tubesheet hole size measuring


With a wide range of sizes and types available, it’s essential to select the right filter bags and cages to suit your specific dust collector model. Following these basic steps will help you make informed decisions when ordering replacements, ensuring smooth operation and extended filter bag life for your dust collection system. 

Another option to find out the right size of your filters and cages is to send us a used filter or cage so we can measure it for you. Feel free to get in contact with us if you prefer this option and we will be happy to assist you.


If you need assistance with measuring filters or cages, please reach out to one of our experts clicking below:

Contact Us to Speak to One of Our Baghouse Experts

For more baghouse related training and information, be sure to check out our Baghouse Online Training page.

Share this article

Related Articles

Get a quote today!